Performance testing is crucial for ensuring your website can handle expected traffic loads and perform optimally under stress. Azure Load Testing provides a fully managed cloud-based load testing service that makes it easy to generate high-scale load and identify performance bottlenecks. In this guide, we’ll explore how to use Azure Load Testing using various approaches.
What is Azure Load Testing?
Azure Load Testing is a fully managed load-testing service that enables you to generate high-scale load using Azure infrastructure. It supports Apache JMeter test scripts and provides detailed insights into your application’s performance, helping you identify bottlenecks and optimize your application before deploying to production.
Key Benefits:
- Fully Managed: No infrastructure management required
- High Scale: Generate load from multiple Azure regions
- JMeter Compatible: Use existing JMeter scripts or create new ones
- Integrated Monitoring: Built-in integration with Azure Monitor and Application Insights
- CI/CD Integration: Seamlessly integrate with Azure DevOps and GitHub Actions
Setting Up Azure Load Testing
Prerequisites
Before you begin, ensure you have:
- An active Azure subscription
- Appropriate permissions to create Azure resources
- Basic understanding of HTTP protocols and web applications
- (Optional) Familiarity with Apache JMeter for custom scripts
Creating an Azure Load Testing Resource
- Navigate to Azure Portal
- Go to portal.azure.com
- Search for “Azure Load Testing” in the search bar
- Create Load Testing Resource
- Click “Create” to start the setup process
- Choose your subscription and resource group
- Select a region close to your target application
- Provide a unique name for your load testing resource
- Configure Settings
- Choose the appropriate pricing tier
- Configure networking settings if needed
- Review and create the resource
Approach 1: Creating Load Tests with Azure Portal UI
The Azure portal provides a user-friendly interface for creating basic load tests without writing any code.
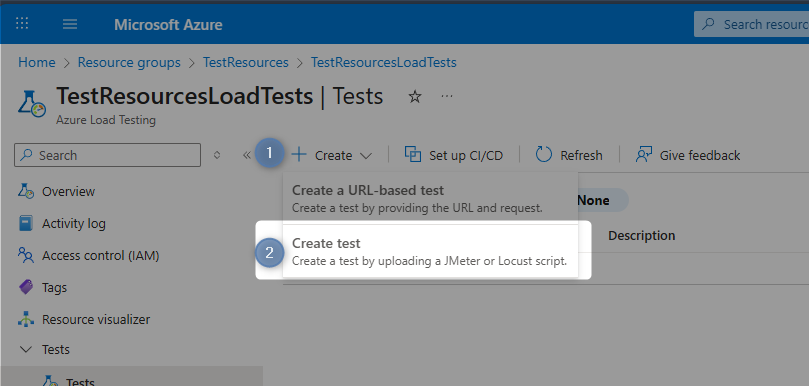
Step 1: Create a New Test
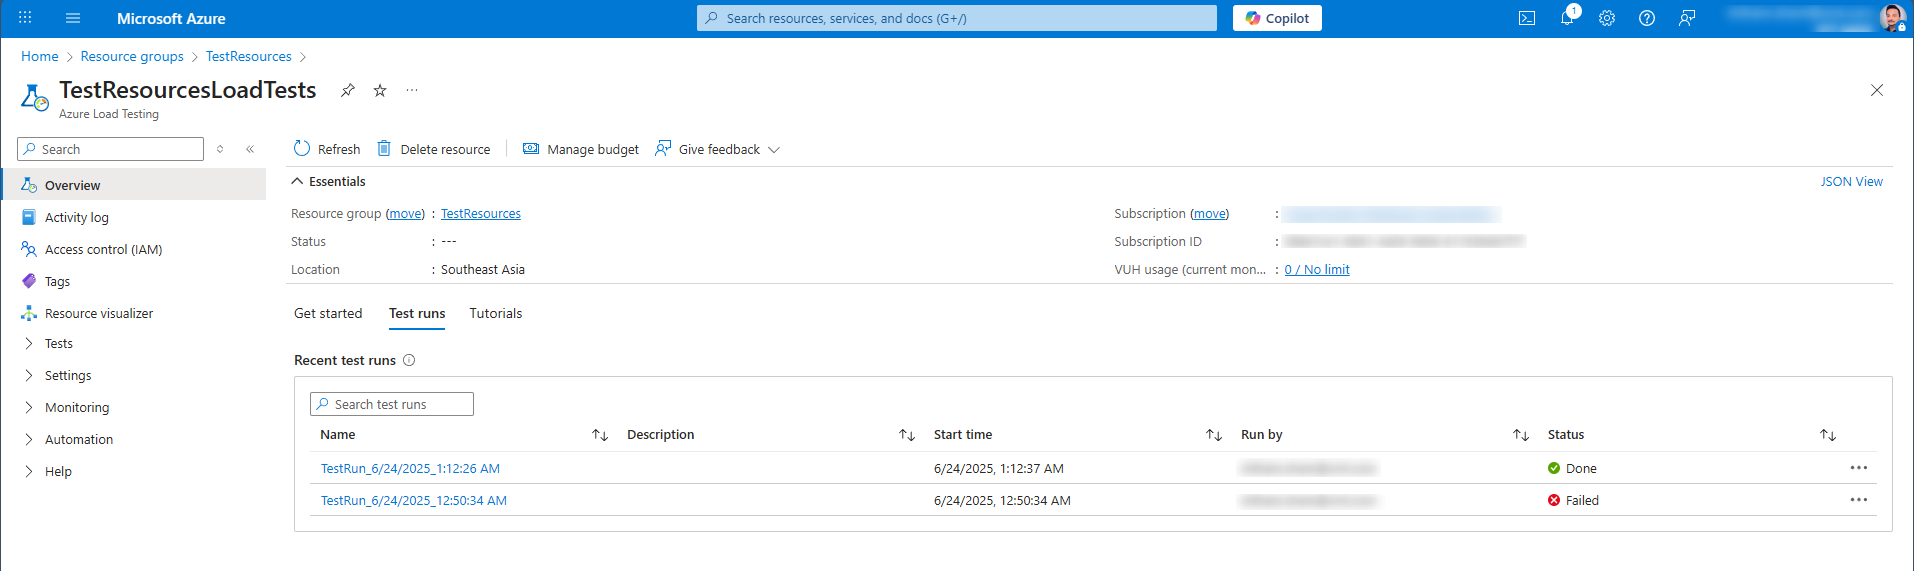
- Navigate to your Azure Load Testing resource
- Click on “Tests” in the left navigation pane
- Select “Create” and choose “Create a URL-Based Test”
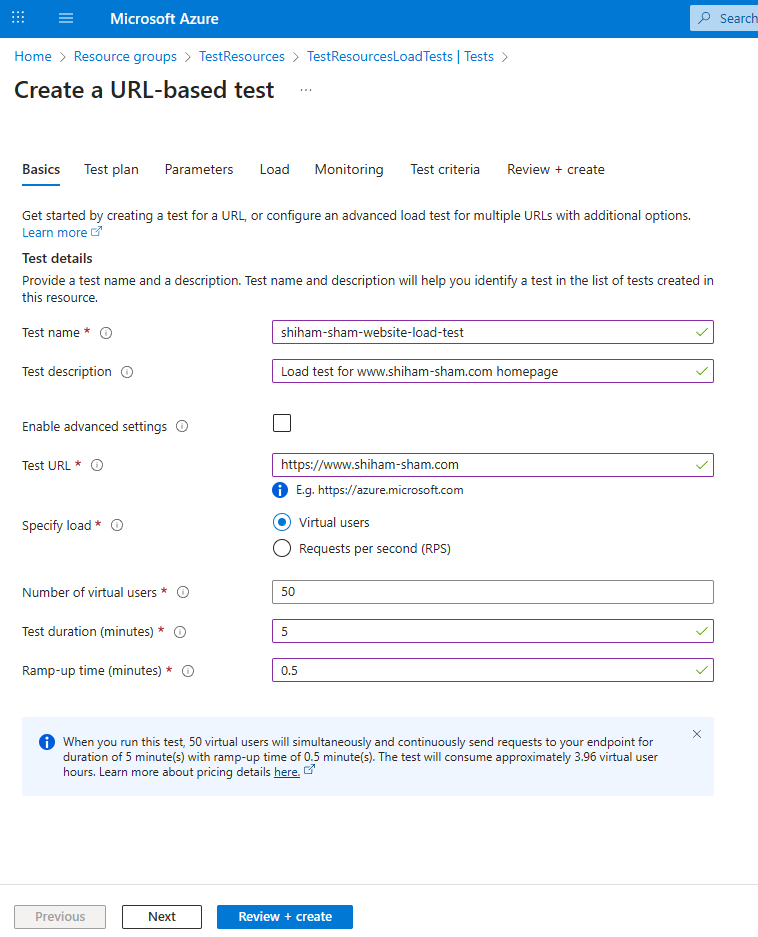
Step 2: Configure Basic Test Parameters
Test Configuration:
  Test Name: "shiham-sham-website-load-test"
  Test Description: "Load test for www.shiham-sham.com homepage"
  Test URL: "https://www.shiham-sham.com"
  Virtual Users: 50
  Test Duration: 5 minutes
  Ramp-up Time: 0.5 Minutes (30 seconds)
Step 3: Advanced Configuration
For more sophisticated testing, configure additional parameters. This will require to check the ‘Enable advance settings’ to enable and enter following parameters manually:
- Test plan
- Parameters
- Load
- Monitoring
- Test criteria
For this attempt, lets configure following parameters.
Load Pattern:
Engine Instances: 1
Pattern Type: Linear
Concurrrent user per engine: 50
Test Duration: 20 minutes
Ramp-up time: 1 minute
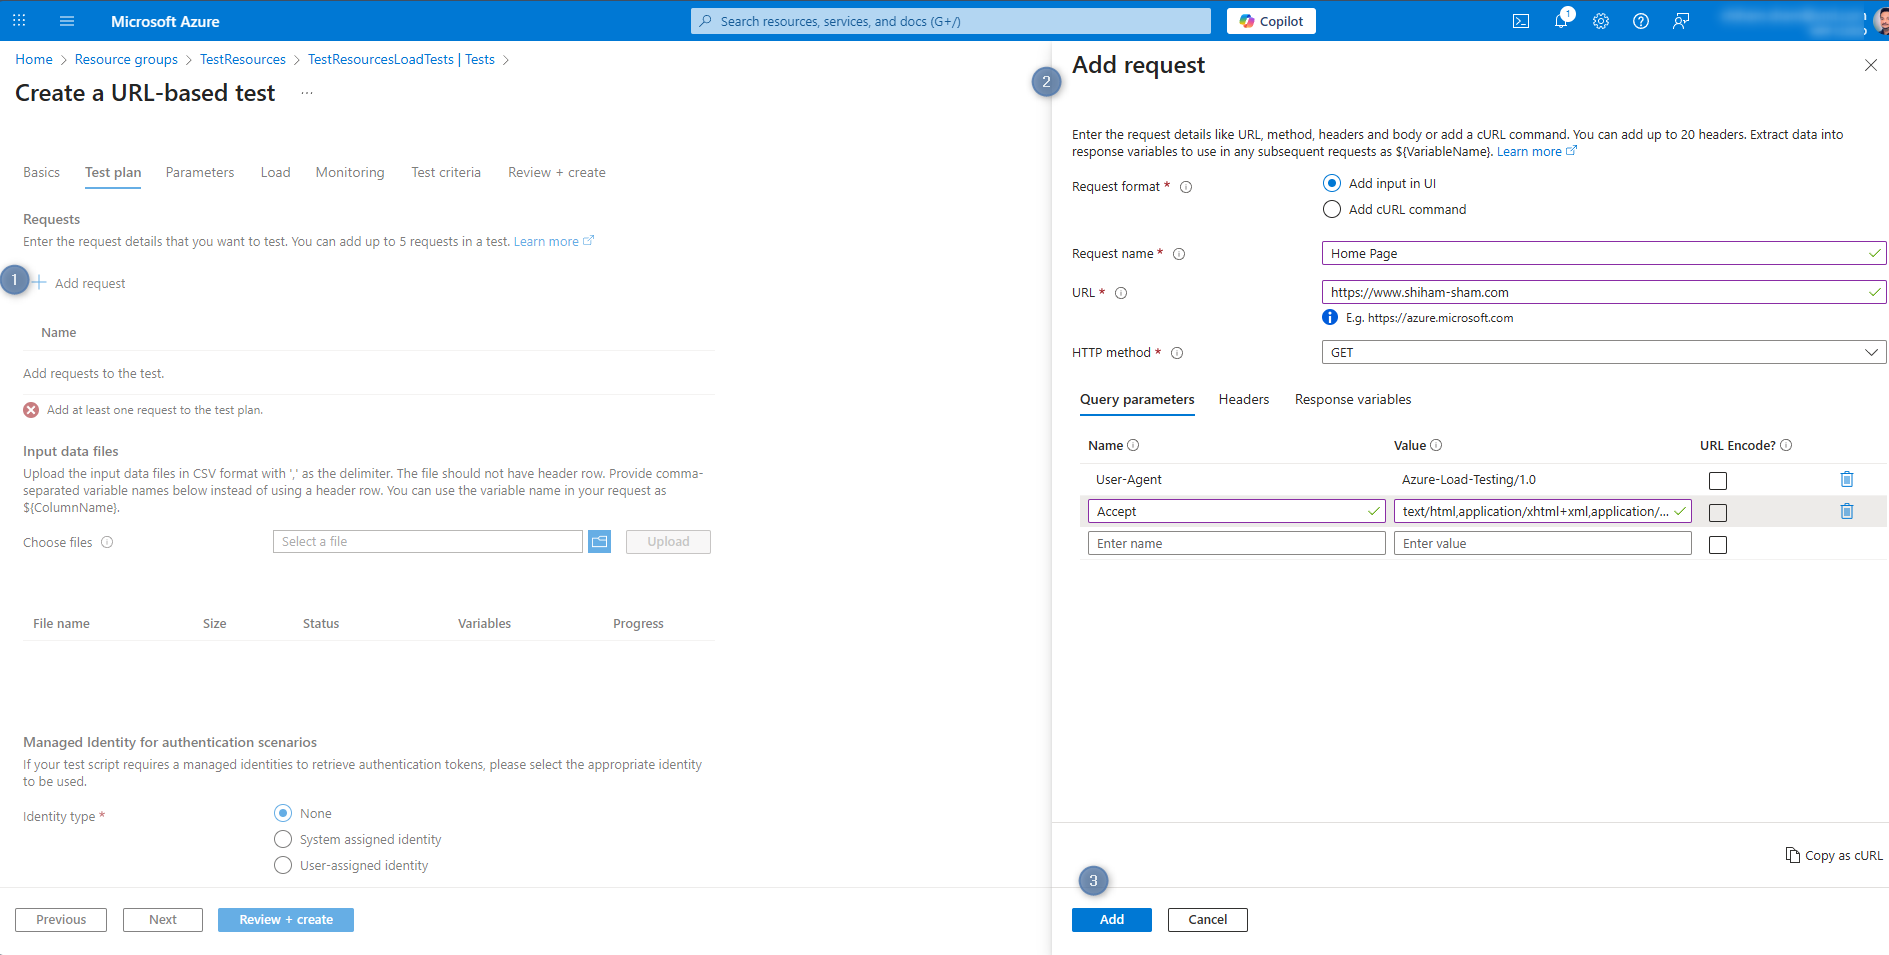
Request Configuration:
Timeout: 30 seconds
Keep-alive: true
Follow Redirects: true
Auto-stop test:
Error Percentage: 90
Time Window: 60 seconds
Maximum users perengine: 5000
Headers:
User-Agent: "Azure-Load-Testing/1.0"
Accept: "text/html,application/xhtml+xml,application/xml;q=0.9,*/*;q=0.8"

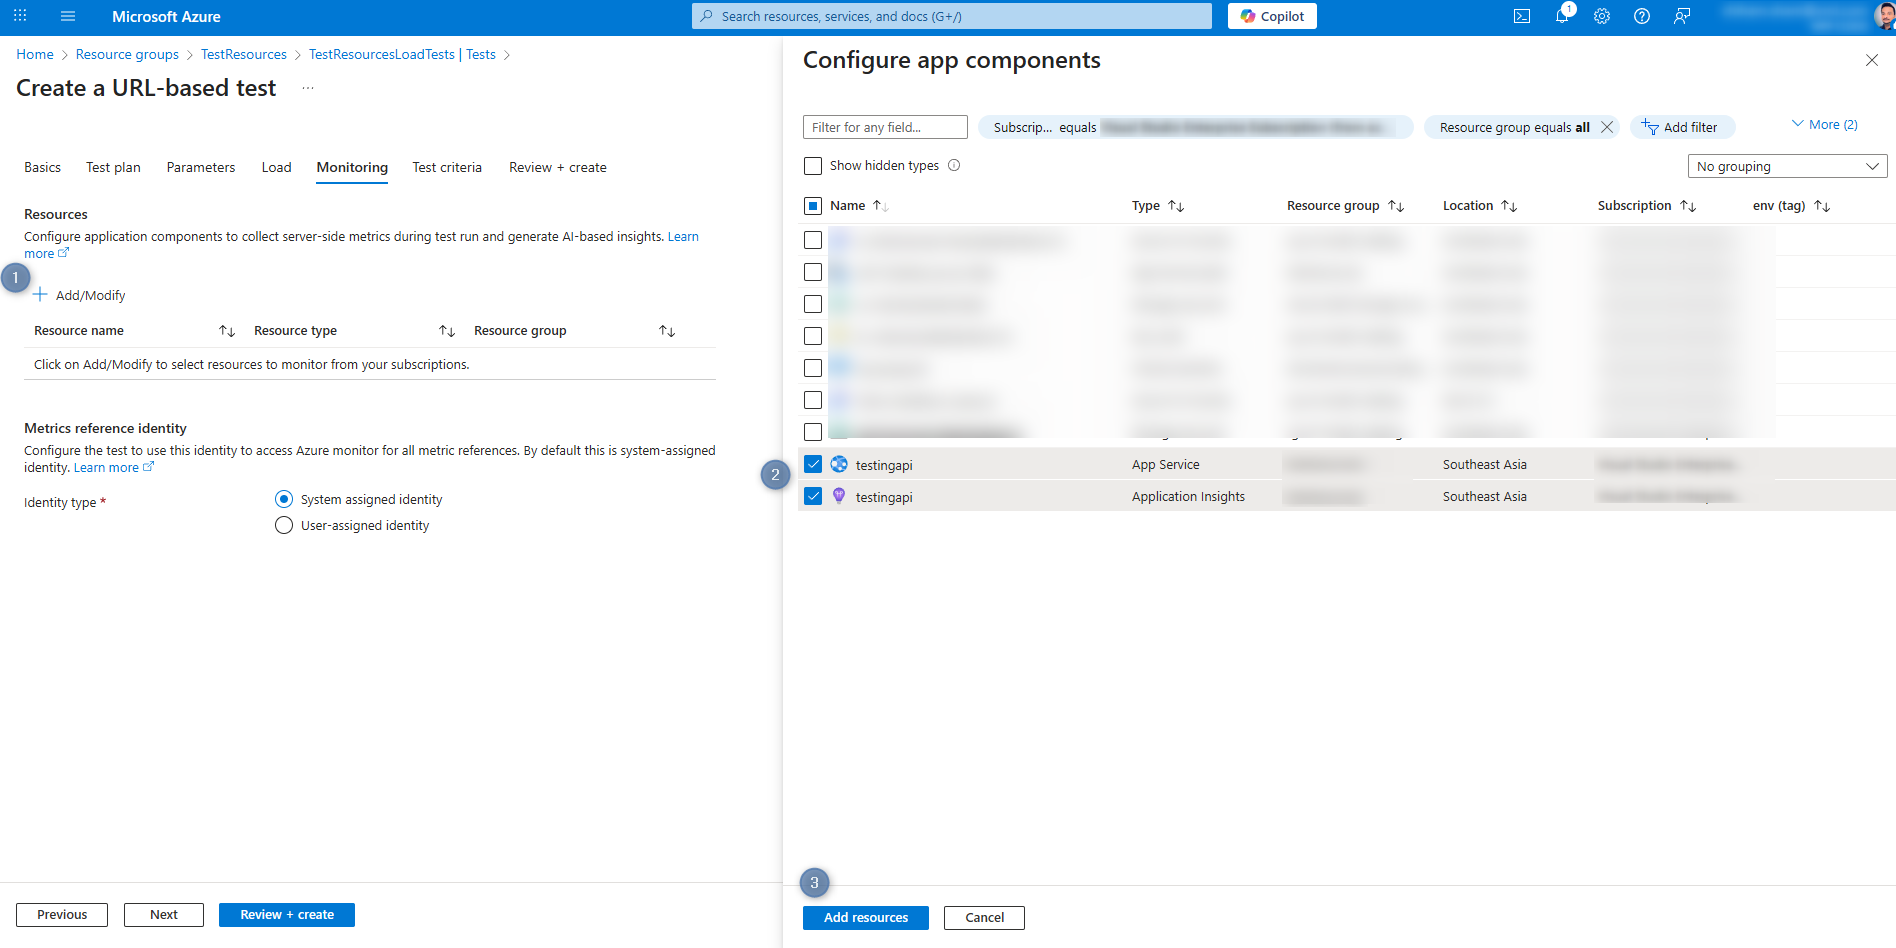
Step 4: Configure Monitoring
Enable monitoring for comprehensive insights:
- Azure Monitor Integration
- Enable Application Insights integration
- Configure custom metrics collection
- Set up alerts for threshold breaches
- Resource Monitoring
- Monitor CPU, memory, and network usage
- Track response times and error rates
- Monitor database performance (if applicable)
Approach 2: Using Custom JMeter Test Scripts
For more complex scenarios, you can upload custom Apache JMeter test scripts using the option ‘Create a test by uploading a JMeter or Locust script’.
Load Test Execution and Monitoring
Running the Test
- Pre-test Validation
- Verify test script syntax
- Validate target endpoints
- Check authentication credentials
- Confirm monitoring setup
- Test Execution
- Start the test from Azure portal
- Monitor real-time metrics
- Watch for early warning signs
- Be prepared to stop if needed
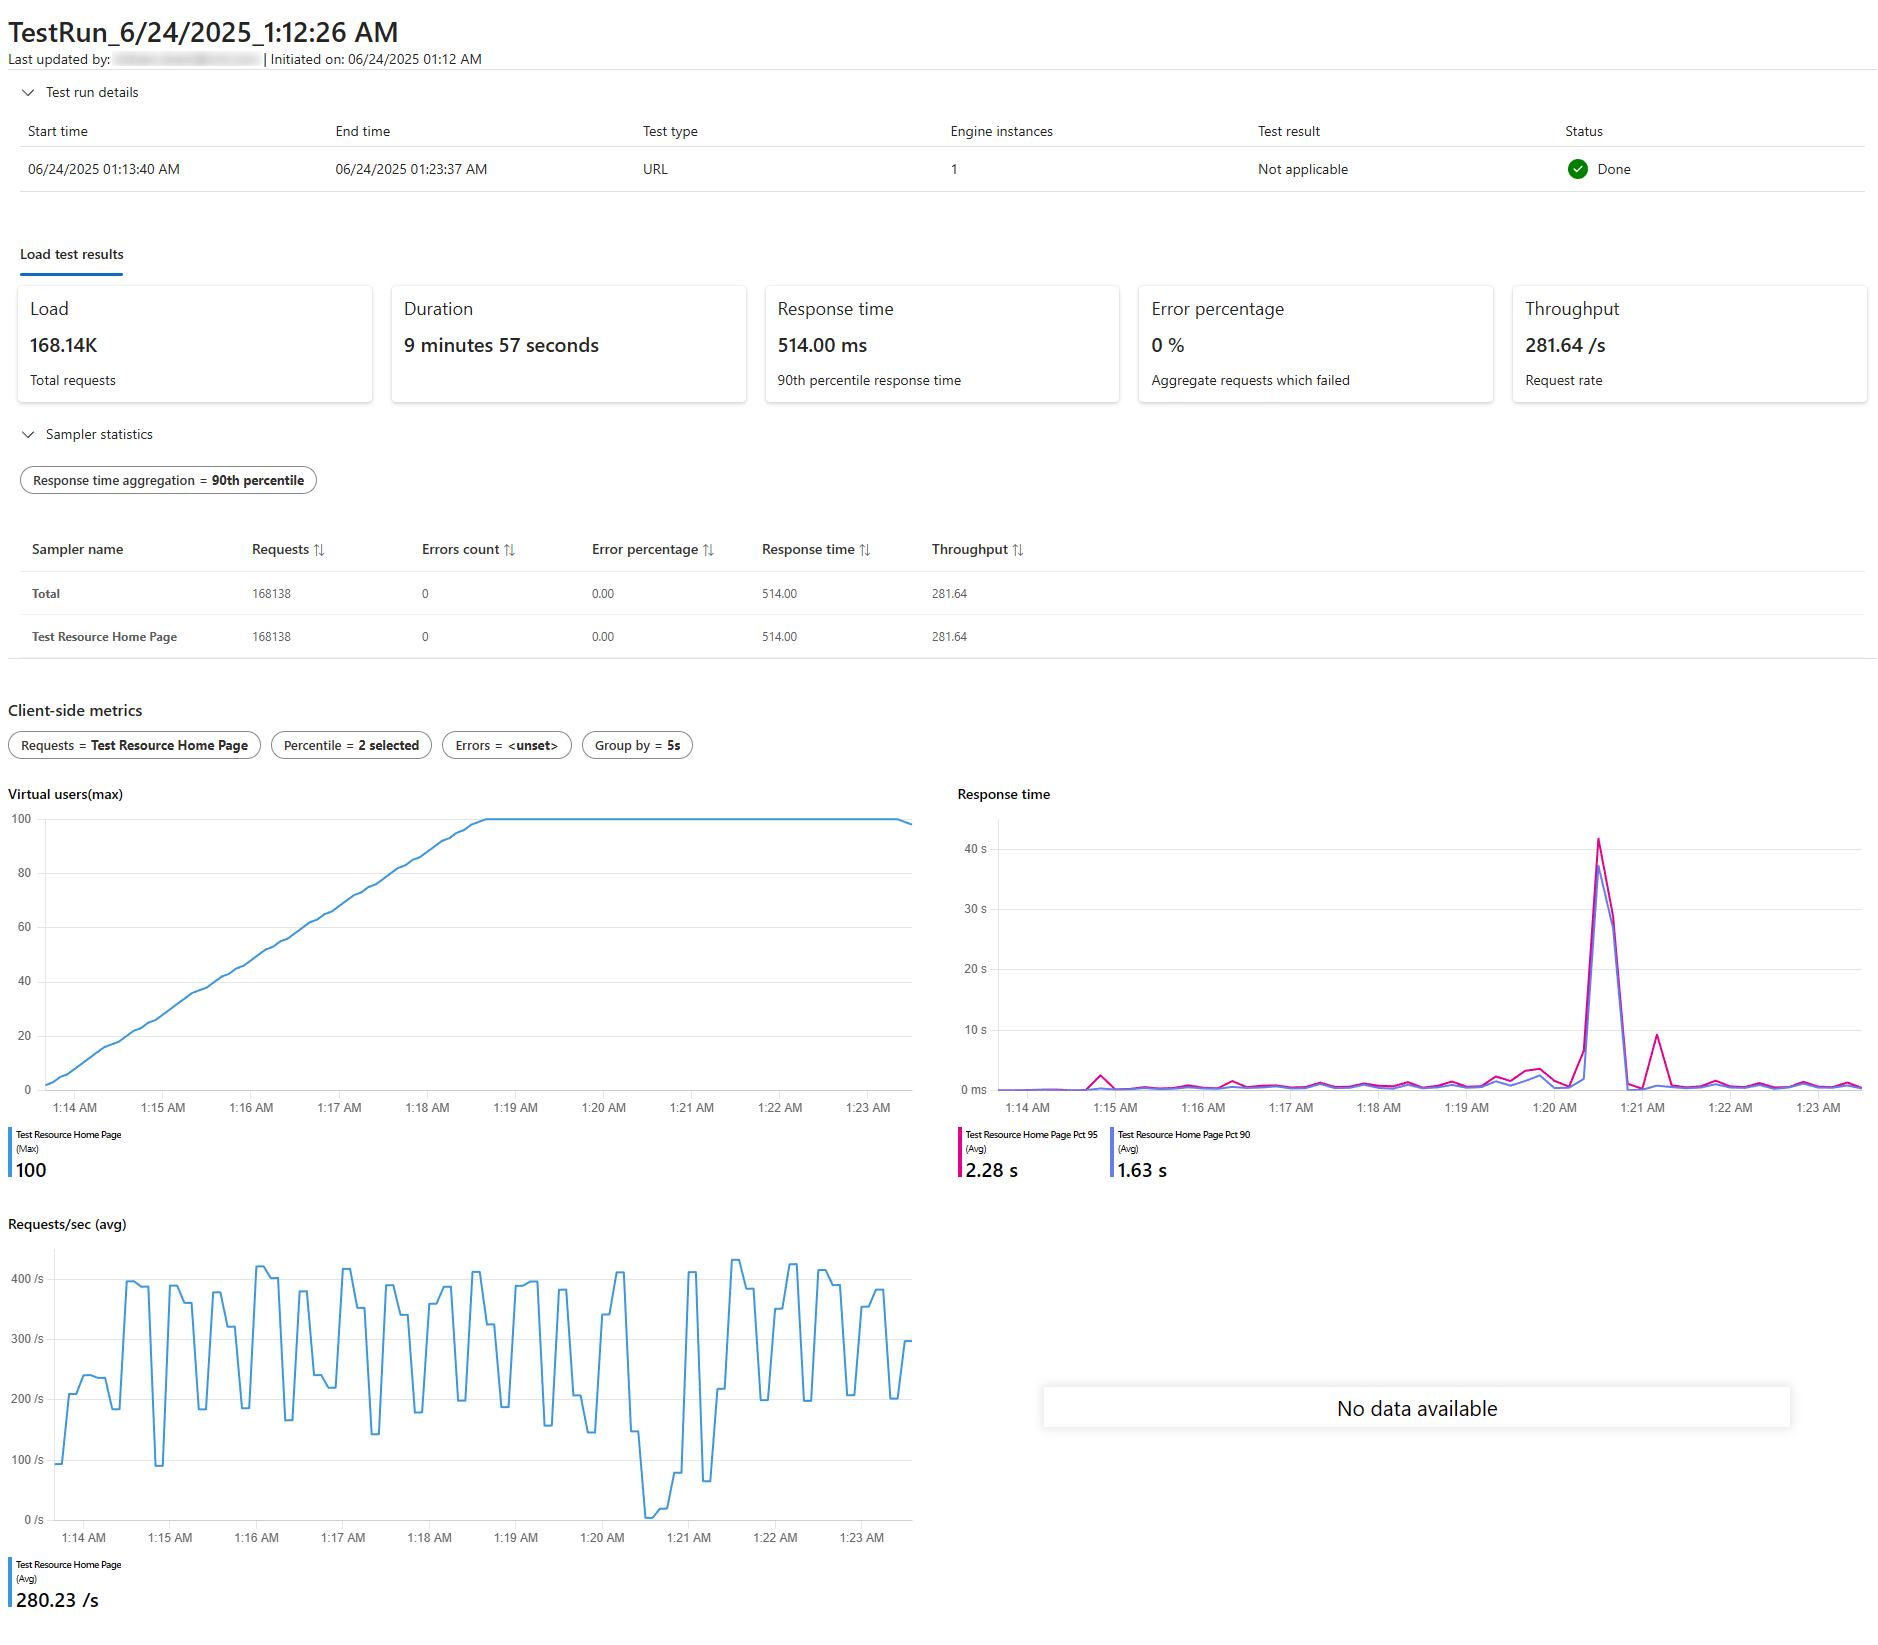
- Real-time Monitoring
Key Metrics to Monitor:
  Response Time: Average, 95th percentile, 99th percentile
  Throughput: Requests per second
  Error Rate: Percentage of failed requests
  Active Users: Current virtual user count
  Resource Utilization: CPU, Memory, Network
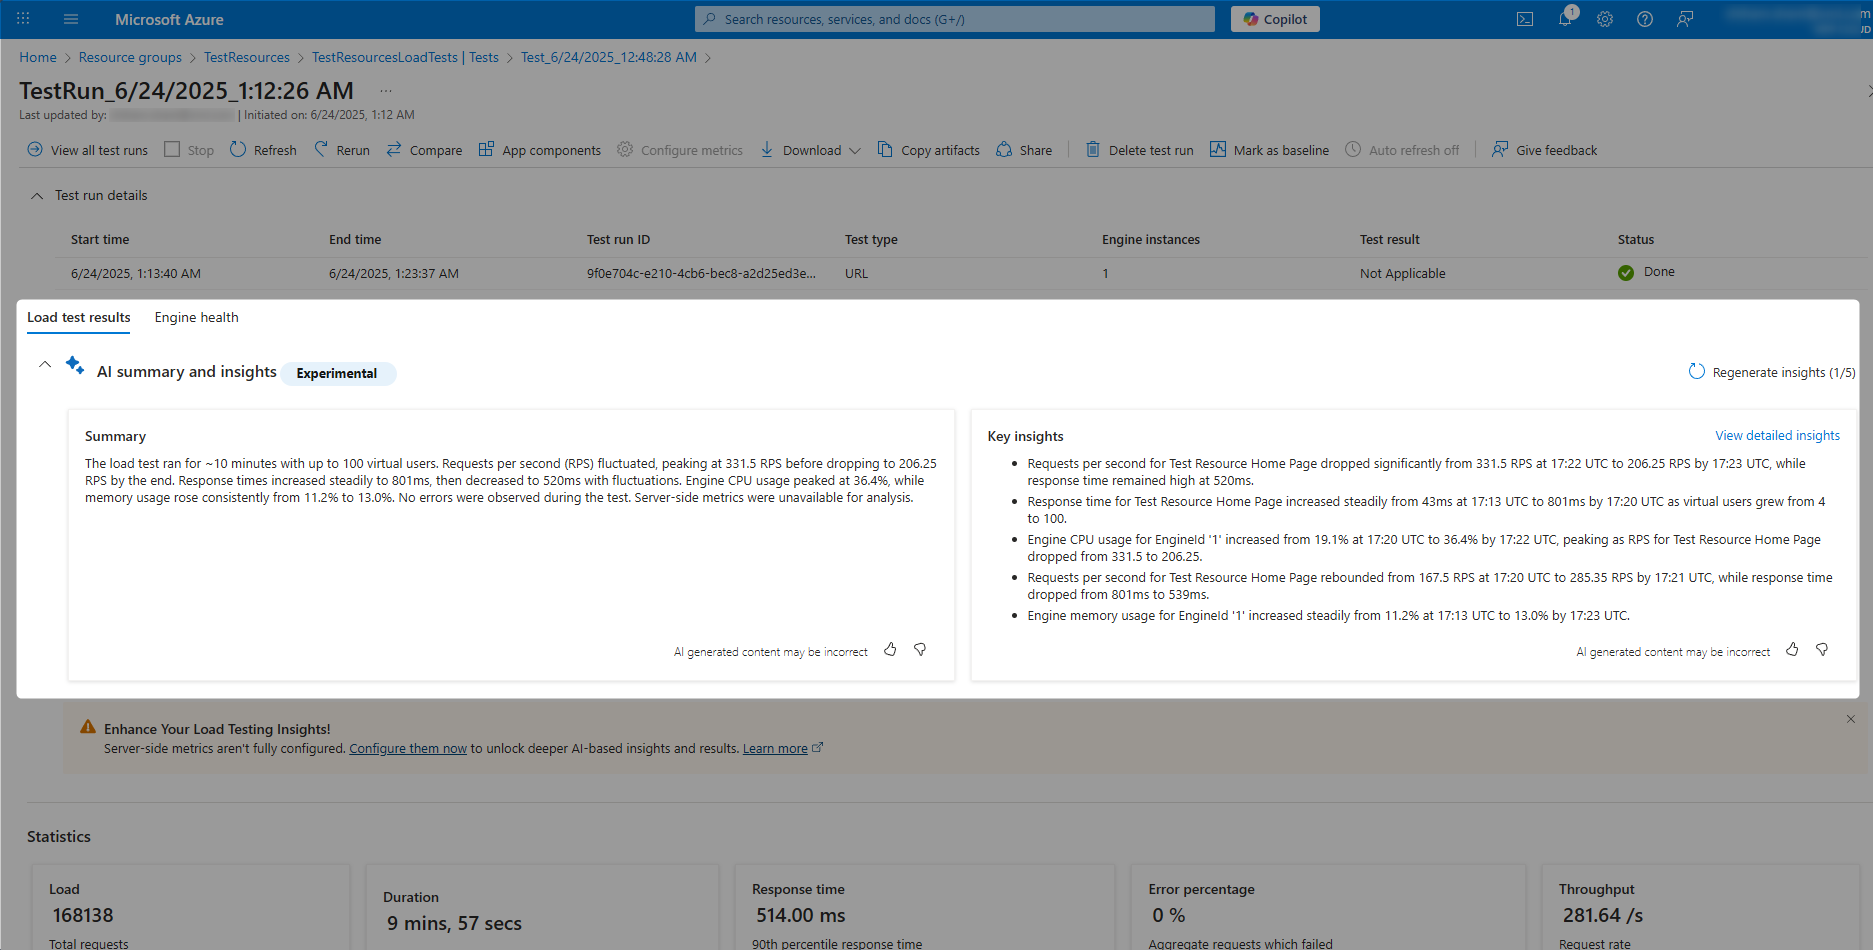
AI-Generated Load Test Reports
Azure Load Testing leverages AI to provide intelligent insights and recommendations based on your test results.
AI Report Features
- Automated Analysis
- Performance bottleneck identification
- Capacity recommendations
- Error pattern analysis
- Optimization suggestions
-
Intelligent Insights
- Predictive Analytics
- Traffic projection based on current trends
- Capacity planning recommendations
- Performance degradation forecasts
- Cost optimization suggestions
Sample AI-Generated Report Structure
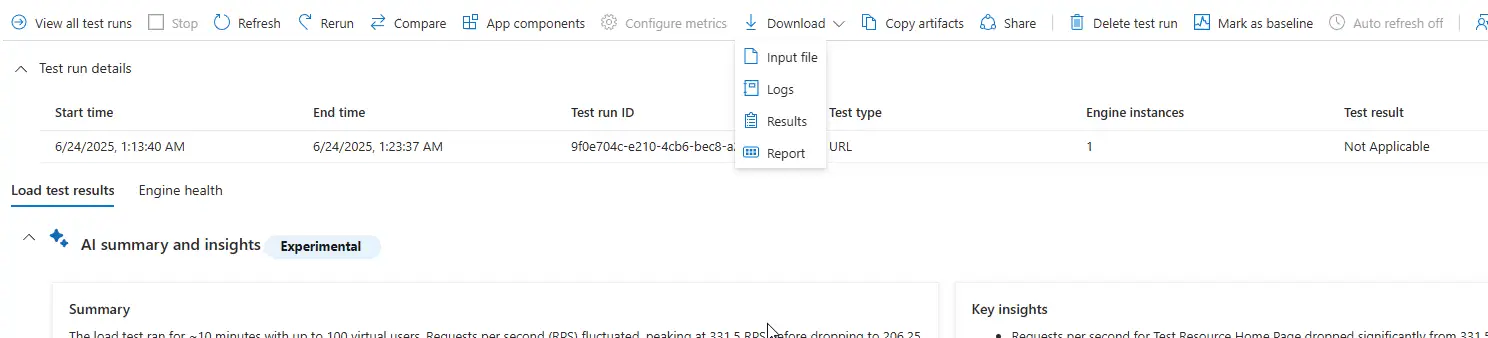
Exporting and Analyzing Test Reports
Export Options
Azure Load Testing provides multiple export formats for detailed analysis, which you can download as a zip file via ‘Download > Report’ option.
This is how HTML script looks like:
Best Practices and Common Test Scenarios
Test Scenarios
- Baseline Load Test
- Purpose: Establish normal performance baseline
- Users: Expected average traffic
- Duration: 10-15 minutes
- Stress Test
- Purpose: Find breaking point
- Users: Gradually increase until failure
- Duration: Until system fails or limits reached
- Spike Test
- Purpose: Test sudden traffic increases
- Pattern: Sudden jump in users
- Duration: Short bursts (1-5 minutes)
- Endurance Test
- Purpose: Test system stability over time
- Users: Sustained load
- Duration: Several hours or days
Best Practices
- Test Planning Checklist
- Define clear performance criteria
- Identify critical user journeys
- Plan test data requirements
- Schedule tests during low-traffic periods
- Prepare rollback procedures
- Test Environment Best Practices
- Use production-like infrastructure
- Isolate test environment from production
- Ensure consistent baseline conditions
- Monitor all system components
- Document environment configuration
- Monitoring and Alert Strategy
- Set up real-time alerts
- Monitor application and infrastructure metrics
- Track business metrics during tests
- Have escalation procedures ready
- Document incident response plans
Conclusion
Azure Load Testing provides a comprehensive solution for performance testing your web applications. By leveraging both the Azure portal UI for quick tests and custom JMeter scripts for complex scenarios, you can ensure your website performs optimally under various load conditions.
The AI-powered insights and detailed reporting capabilities help identify bottlenecks and optimization opportunities, while the integration with Azure Monitor provides comprehensive observability during testing.
Implementing regular load testing will help ensure optimal performance as traffic grows and features are added. Start with baseline tests using the portal UI, then gradually implement more sophisticated test scenarios using custom JMeter scripts as your testing maturity increases.
Remember to always test in a safe environment, monitor all relevant metrics, and have contingency plans ready. Performance testing is an ongoing process that should be integrated into your development lifecycle to catch issues early and maintain optimal user experience.